Early in the morning factory whistle blows. Man rises from bed and puts on his clothes.
Man takes his lunch, walks out in the morning light. That’s the working life.
When at work man logs in to his workstation using his credentials. Just like every day, only difference being that this time he isn´t the only one using his credentials. Some hacker has been able to Phish for them credentials and has logged in using them from across the world just a few hours ago. Luckily for the company this kind of behavior triggers Impossible Travel Risk Event in Azure AD.
If you have your E5 Licenses in place you can get automatic alerts when these events happen. If you don´t have E5 Licenses the events are there, but you need to monitor them yourself. In this Blog I will tell you how you can accomplish that by a simple Powershell script that can be scheduled to run as Azure Automation runbook or as Scheduled Task on Windows Server (not covered in this post).
Prerequisites
Script uses Graph API to collect the events. In order to connect to Graph API with Powershell you will need to create an App Registration in Azure AD. I wont go into detail of that because it´s been explained thoroughly here:
https://docs.microsoft.com/en-us/azure/active-directory/identity-protection/graph-get-started
You will also need an account with mailbox in Office 365. This account should not have MFA or Conditional Access policies effective. This account is used for sending the report via email.
And then we are good to go
Part 1: Automation Account
First we create an Automation Account to Azure AD. For this procedure you will need Owner permissions for the Azure Subscription. You can remove the permissions when you have created the Automation Run As Account.
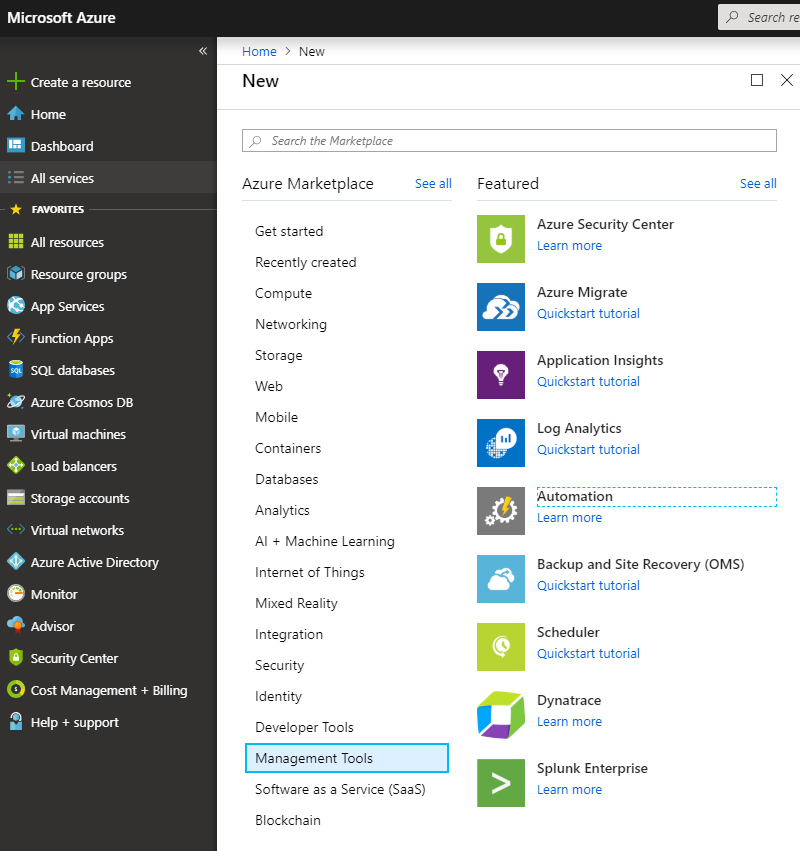
- From Azure Portal click “Create a resource”
- Click “Management Tools”
- Click “Automation”
- Enter the Account Name, such as “ImpossibleTravelReport”
- Select Subscription, Resource group and Location accordingly
- Create Azure Run As account: Yes
- Click “Create”
Part 2: Email Credentials
After you have created the automation account open it by clicking “All Resources” from main menu and then search for the created Automation Account and click it open.
From Automation Account menu click “Credentials” under “Shared Resources” and Add a credential for your Office 365 account with mailbox.
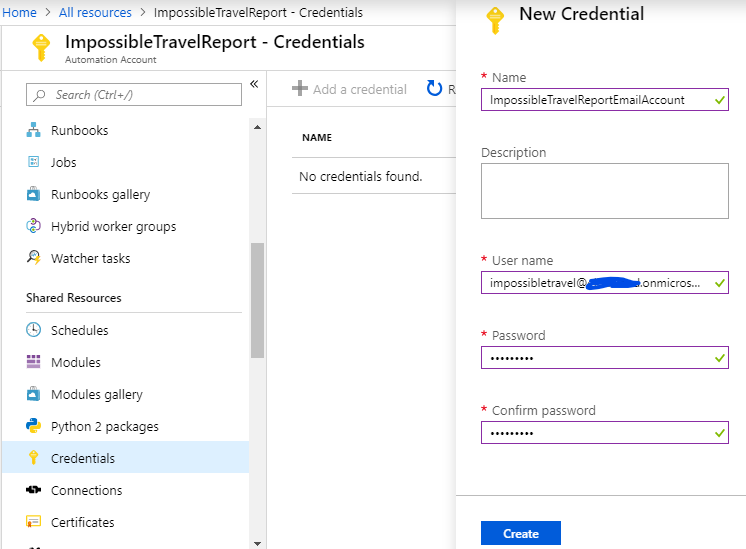
Now you have created the credentials to use with the Automation Runbook Powershell script
Part 3: Automation Runbook
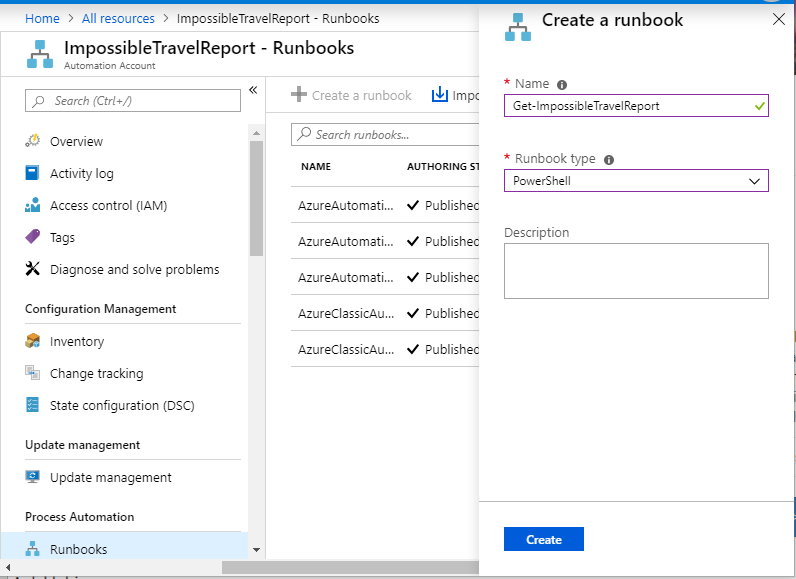
From Automation Account menu click “Runbooks” under “Process Automation” and then “Create a runbook” from top menu. Give your runbook a name such as “Get-ImpossibleTravelReport” and select “PowerShell” as Runbook Type and click Create.
From Runbook Overview click Edit to get to the business
Part 4: The actual Powershell Script
First you select the credentials you created previously. Click Assets – Credentials and select the credentials you created. Click three dots and Add to Canvas so that this line appears on the beginning of the Script window:
Get-AutomationPSCredential -Name 'ImpossibleTravelReportEmailAccount'
To create a Powershell script for getting data from Graph API you will need following information from your tenant and App Registration that was the first prerequisite mentioned in this blog post:
- Tenant Domain
- App ID
- App Secret
I will put the whole script at the end of this post, but let´s go through some key points here.
Graph API platform does not require credentials. You authenticate using following information:
$ClientID= "THIS IS YOUR APP ID"$ClientSecret= "THIS IS YOUR APP SECRET"$tenantdomain= "yourdomain.onmicrosoft.com"
Graph API uses URL to obtain the report data. That URL can contain filtering if and when you want to get data from certain timeframe such us last 24 hours. You can customize the URL using variables for date parameter. If you want to have longer time period just change the value of AddDays to your preference
$OneDayAgo= ((Get-Date).ToUniversalTime()).AddDays(-1) | Get-Date-format yyyy-MM-dd'T'HH\:mm\:ss.fffffff'Z'$URLOneDayAgo= "https://graph.microsoft.com/beta/ImpossibleTravelRiskEvents?`$filter=createdDateTime gt "+$onedayago
When you have your result data ready you can choose what to do with it. For example you can choose to send the report only if it has entries like I did here. Also when sending mail we use Credential variable that contains the AutomationPSCredential we added to our script from Runbook Assets.
if ($XMLReportValues-ne $null) {#Place results into a CSV$AuditOutputCSV= "ImpossibleTravelRiskEvents.csv"$XMLReportValues| selectUserDisplayName,UserPrincipalName,RiskEventStatus,RiskLevel,RiskEventType,RiskEventDateTime,ClosedDateTime,ipaddress,location | Export-csv $AuditOutputCSV-NoTypeInformation-Force-append-encodingunicodeSend-MailMessage -Credential $creds -SmtpServer $mailsrv -UseSsl -From $mailfrom-To $mailto -Subject $mailsubject -Body $mailbody -BodyAsHtml-Attachments $auditoutputcsv
}
Those are the customizable portions of the script explained. Now before we get to the actual script lets do the scheduling. Before you can Schedule a runbook you need to publish the script that you are working on.
Part 5: Adding a Schedule to Runbook
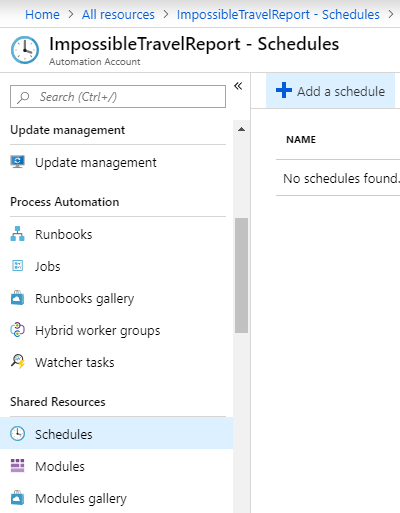
- Go to ImpossibleTravelReport Automation Account main menu and select “Schedules” under “Shared Resources”.
- Add a Schedule
- Give your schedule a name and select other attributes as you prefer. I chose to create a schedule that runs daily at 6:00 AM
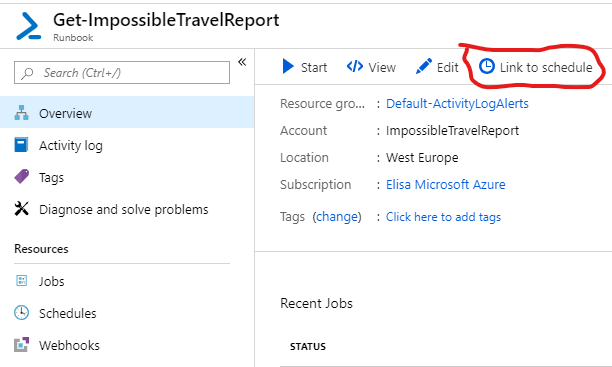
From Runbook Overview page click “Link to Schedule” and then select the schedule you created. If “Link to Schedule” is greyed out you need to Edit you script and publish it.
Now you´re pretty much ready. You just need to have the script in place and then test it. Here is my version of this script in full glory. Beware of the missing spaces and other copy – paste errors and check thoroughly before deploying. This script checks ImpossibleTravel events from past 24 hours, exports them to a csv – file and sends the file by email to selected recipients.
# Script to obtain impossible travel events from previous 24 hours using Graph API and send results as csv by email# Customized from Microsoft Sample Script by Matti Väliniemi
$creds=Get-AutomationPSCredential-Name'ImpossibleTravelReportEmailAccount'
$ClientID= "YOUR APP ID"$ClientSecret= "YOUR APP SECRET"$tenantdomain= "YOURTENANT.onmicrosoft.com"
$loginURL= "https://login.microsoft.com"$resource= "https://graph.microsoft.com"
$body= @{grant_type="client_credentials";resource=$resource;client_id=$ClientID;client_secret=$ClientSecret}$oauth= Invoke-RestMethod-MethodPost -Uri$loginURL/$tenantdomain/oauth2/token?api-version=1.0 -Body$body
$mailsrv="smtp.office365.com"$mailfrom="RiskEvent.Reporting@YOURTENANT.onmicrosoft.com"$mailto="Recipient1@domain.com","Recipient2@domain.com"$mailsubject="Impossible Travel Events from last 24 hours"$mailbody="Impossible Travel Events Attached. This Report is generated automatically by Azure Automation Runbook Get-ImpossibleTravelEvents.
# Create variable to get events from previous 24 hours$OneDayAgo= ((Get-Date).ToUniversalTime()).AddDays(-1) | Get-Date-formatyyyy-MM-dd'T'HH\:mm\:ss.fffffff'Z'# Create URL using $onedayago variable$URLOneDayAgo= "https://graph.microsoft.com/beta/ImpossibleTravelRiskEvents?`$filter=createdDateTime gt "+$onedayago
Write-Output$oauth
if ($oauth.access_token -ne$null) {$headerParams= @{'Authorization'="$($oauth.token_type) $($oauth.access_token)"}
$url= $URLOneDayAgoWrite-Output$url
$myReport= (Invoke-WebRequest-UseBasicParsing-Headers$headerParams-Uri$url)
$ConvertedReport= ConvertFrom-Json-InputObject$myReport.Content$XMLReportValues= $ConvertedReport.value #Collect initial results into arrayif ($ConvertedReport.value.count -lt100){$nextURL= $ConvertedReport."@odata.nextLink"if (($ConvertedReport.value.count -ne0) -and($nextURL-ne$null)){Do { #Collect any additional results into array$nextURL= $ConvertedReport."@odata.nextLink"$Report= Invoke-WebRequest-UseBasicParsing-Headers$headerParams-Uri$nextURL$ConvertedReport= ConvertFrom-Json-InputObject$Report.Content$XMLReportValues+= $ConvertedReport}While ($NextResults."@odata.nextLink"-ne$null)}}
if ($XMLReportValues-ne$null) #Send results only if there are entries{#Place results into a CSV$AuditOutputCSV= "ImpossibleTravelRiskEvents.csv"$XMLReportValues| selectUserDisplayName,UserPrincipalName,RiskEventStatus,RiskLevel,RiskEventType,RiskEventDateTime,ClosedDateTime,ipaddress,location | Export-csv$AuditOutputCSV-NoTypeInformation-Force-append-encodingunicodeWrite-host"Security report for Identity Risk Events can be found at"$AuditOutputCSV"."
Write-host"Sending results in email"Send-MailMessage-Credential$creds-SmtpServer$mailsrv-UseSsl-From$mailfrom-To$mailto-Subject$mailsubject-Body$mailbody-BodyAsHtml-Attachments$auditoutputcsv
}}

0 Comments