About six months ago I started a blog post series where I was supposed to write also about Zero-touch enrollment. I wrote then two posts about Mobile device Automatic Enrollment:
My plan was also write from Android Zero-touch, but had everything going on and forgot it. So now here it is, hopefully you enjoy about this one also 🙂
Zero-touch works quite similarly than KME. You have three possibilities:
- Personally-enabled devices: End-users can run private applications normally on device, but all work applications are on work-profile that is managed by company This method is not supported at all by ZT!!!
- Corporate-owned dedicated device: Locked down kiosk-mode devices that run one or more applications only
- Corporate-owned fully managed user devices: Only work mode enabled, personal side not available at all.
To apply into the Zero-touch program, you don’t have to request anything from anywhere as in KME or DEP. If you don’t have yet Zero-touch, just request your Android reseller to create an account for you.
Zero-touch
To start using Zero-touch, create a profile to your zero-touch portal. You get credentials to the portal, when your reseller creates first your company to the portal. I encourage you to create first an admin account to the service. Admin account helps you in the emergency situation, when personal log in details has lost. After creating the admin account, create necessary personal accounts for your company under users-section.

Configurations
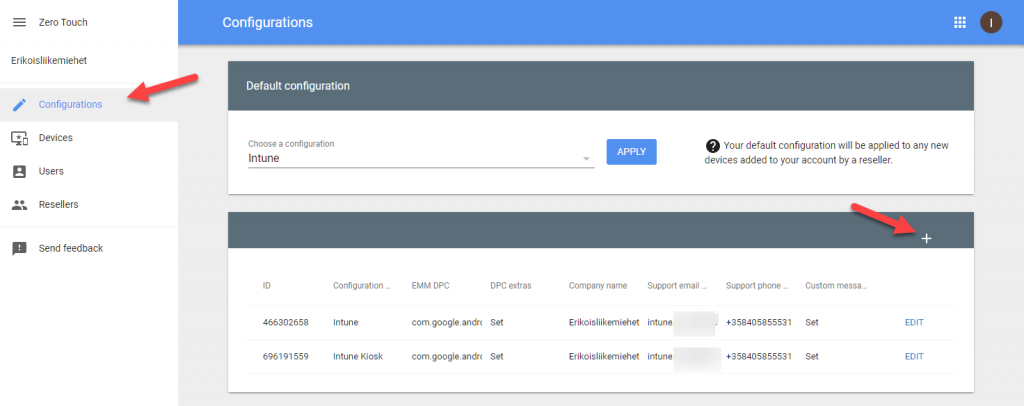
Under Configurations section you can create a new configuration by selecting the small plus-sign in the right hand side of the title bar (I looked myself it for a very long time where it is :D).
Start giving the name for the profile for example Intune Kiosk and select Microsoft Intune for the value in the EMM DPC field. Next you must add DPC extras JSON-string to provide information for the enrollment session. I used the next JSON in my profile:
{
    "android.app.extra.PROVISIONING_DEVICE_ADMIN_COMPONENT_NAME": "com.google.android.apps.work.clouddpc/.receivers.CloudDeviceAdminReceiver",

    "android.app.extra.PROVISIONING_DEVICE_ADMIN_SIGNATURE_CHECKSUM": "I5YvS0O5hXY46mb01BlRjq4oJJGs2kuUcHvVkAPEXlg",

    "android.app.extra.PROVISIONING_DEVICE_ADMIN_PACKAGE_DOWNLOAD_LOCATION": "https://play.google.com/managed/downloadManagingApp?identifier=setup",

    "android.app.extra.PROVISIONING_ADMIN_EXTRAS_BUNDLE": {
        "com.google.android.apps.work.clouddpc.EXTRA_ENROLLMENT_TOKEN": "ABCDEFGHIJKLMNOPQRSTUVWXYZ"
    }
}
Don’t forget to change the last EXTRA_ENROLLMENT_TOKEN for the token from Intune. Closer information how to get the token from Intune, look from the KME-post.
After DPC extras, Fill in your company name, support email-address, support phone and custom message if you want. The custom message might be shown during the enrollment process, I haven’t seen it yet anywhere.
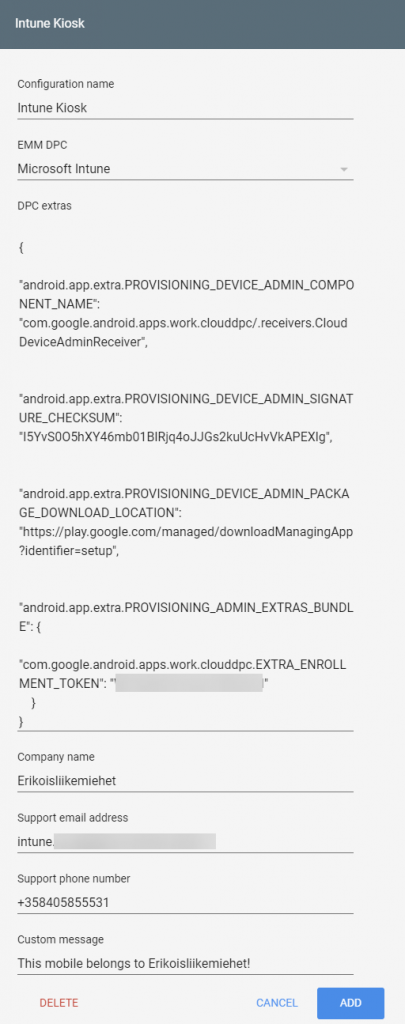
At the end, save the profile by selecting the Add-button at the end of the box.
Assigning the profile
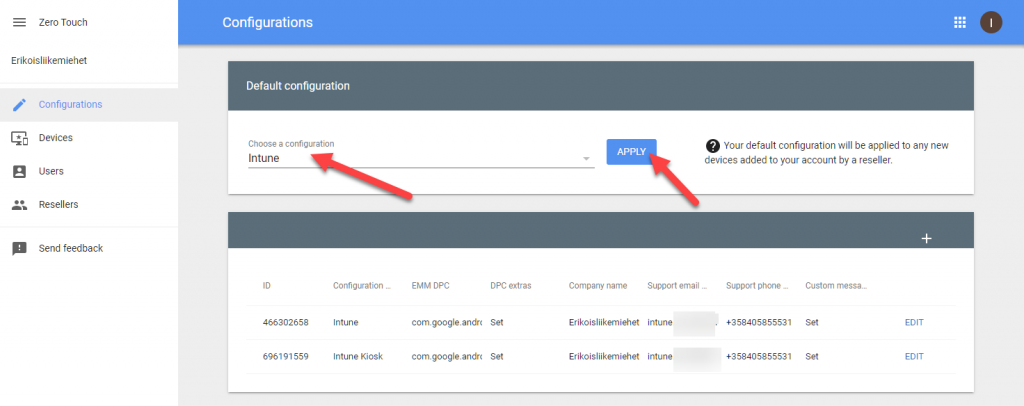
After you have created your profile, choose the default profile for new mobiles. You can choose it from the Configurations page under Default configuration. Remember to confirm selection by selecting the Apply-button. This is not overriding your old mobile device configuration selections. This effects only for new mobile devices which are added to your zero-touch account.
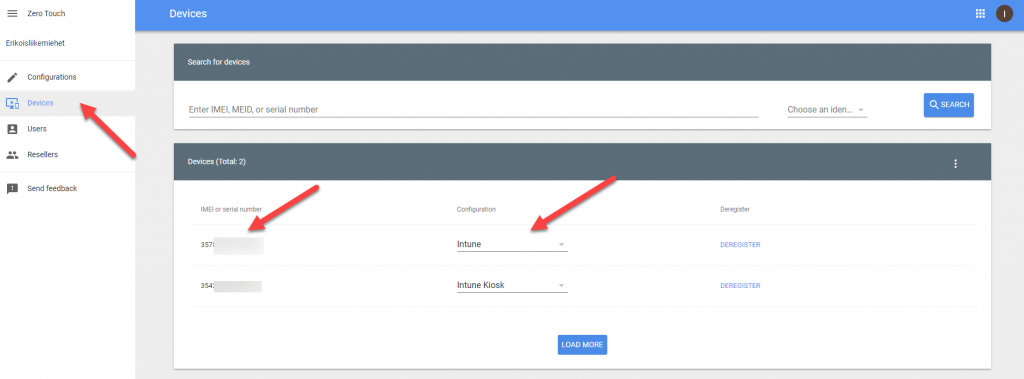
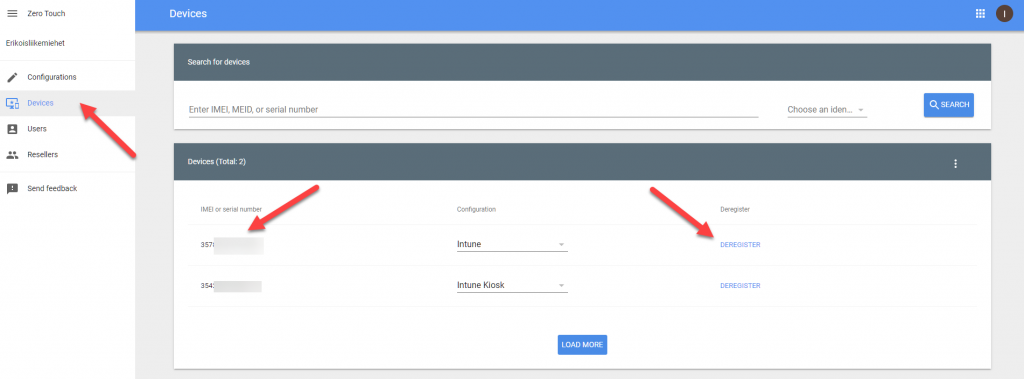
To change the individual profiles for mobiles, you can go under the devices-section and change the configuration for the particular IMEI or serial number.
Device management
You are not able to add new devices to the Zero-touch portal yourself. Your reseller must do it for you. If you want to add some old mobile devices to the Zero-touch, you can ask your reseller to upload those to the portal. To be very kind for your reseller, prepare the file ready for them.
Creating file for old device upload
First, go to the Resellers-section in the Zero-touch portal and find your customer id from the first box.

Next collect or IMEI-codes and manufactures of those devices to the excel. If your mobile device does not have SIM-card slot, collect Serial Number of it. NOTE! If it has SIM-card slot, you have to use IMEI and if you have multiple SIM-card slots, use the first one.
Prepare a CSV-formatted file for your reseller. If this is not working, up-to-date information is available in Google’s documentation page.
| Title | Value |
| modemtype | IMEI (required for SIM-card devices) |
| modemid | Your IMEI-number (required for SIM-card devices) |
| serial | Serial of your device (required for non-SIM-card devices) |
| model | Model from Google’s list (required for non-SIM-card devices) |
| manufacturer | Manufacturer from Google’s list |
| profiletype | ZERO_TOUCH |
| owner | Your customer ID |
At the end you should have a CSV-like below (first row with SIM-card device and another without it).
modemtype,modemid,serial,model,manufacturer,profiletype,owner
IMEI,123456789012347,,,Google,ZERO_TOUCH,54321
,,ABcd1235678,VM1A,Honeywell,ZERO_TOUCH,54321
After you have prepared the list of old mobile devices, send the file to your reseller and ask him/her to upload the list to the Zero-touch portal.
Deregistering devices
You can deregister your mobile devices from Zero-touch by selecting DEREGISTER-text under Devices section on the specific device row. If you have leased your mobile devices and you have to return those, remember to deregister devices before you are returning those to the leasing company.
Summary
Zero-touch is helping companies during the mobile enrollment process. End-user experience is much more easier while enrolling the device from scratch. I encourage you to select your Android mobile device resellers based on Zero-touch and KME delivery capabilities! And remember. This all is free of charge!!

0 Comments